Back in 2009 I became the job to design and start realizing a quite large web application for a health care research project. I took some time, sat down and thought about the technology stack, I would like to use to build it. As we wanted to have an RIA and I already had some experience with GWT, we quickly decided to use it. Since then four years have passed and we are about to release the 2.0 version of our system. During this time, the whole team learned a lot about GWT, its advantages and also some disadvantages, and I thought it would be useful to write some of them up. This part is about the status quo, in the second part I will try to write about a GWT setup I would go for, when starting the project today - so if you have any hints in this regard, please feel free to leave a comment, I would definitely appreciate it!
1. Client setup
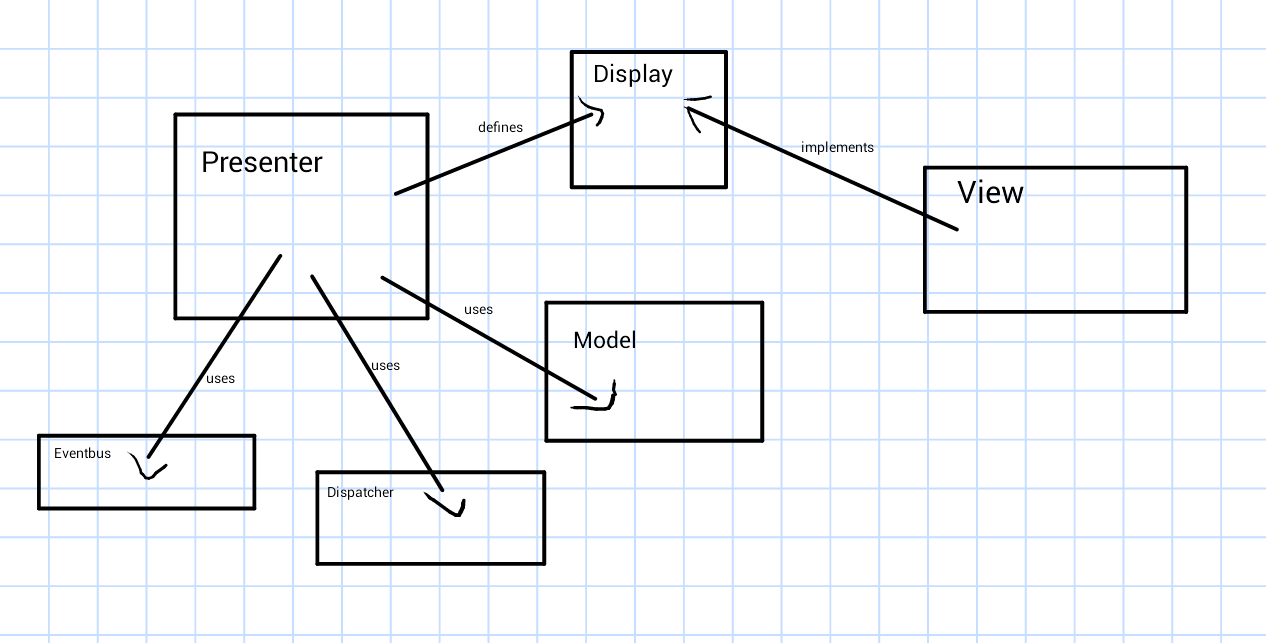
Around the same time, as I started to draw the first diagrams of the inner life of our web app, Ray Ryan gave a talk at the IO conference about the best practices for GWT app architecture, mentioning the model view presenter, the usage of an event bus for components communication and the command pattern for dispatching the GWT-RPC calls to the server. Shortly after I discovered the gwt-presenter and the gwt-dispatch libraries, offering an easy way to build an GWT app based on the principles from Ray’s talk. I also found a very detailed blog post explaining how everything works together.

Presenter & Display:
public class HistoryPresenter extends WidgetPresenter<HistoryPresenter.Display>
		implements PresentsDTO<HistoryDTO> {

	public interface Display extends WidgetDisplay, Resettable, Editable {
		HasText getPrimaryDisease();
		HasText getPrimaryDiagnosis();
		HasValue<Date> getPrimaryDiseaseStart();
		HasValue<String> getHypertension();
		// (...) and some more stuff here
	}

	private HistoryDTO currentDTO;
	private final DispatchAsync dispatcher;

	@Inject
	public HistoryPresenter(final Display display, final EventBus eventBus, final DispatchAsync dispatcher) {
		super(display, eventBus);
		bind();
	}

	@Override
	protected void onBind() {
		// Add handlers to the event bus if needed
	}

	@Override
	public void resetUI() {
		currentDTO = null;
		display.resetUI();
	}

	@Override
	public HistoryDTO getDTO() {
		syncDTO();
		return currentDTO;
	}

	@Override
	public void syncDTO() {
		// create new DTO object with the content from the display
	}

	@Override
	public void showDTO(HistoryDTO dto) {
		// refresh the display with the data from the DTO
	}

	@Override
	public void setEditable(boolean value) {
		display.setEditable(value);
	}

	@Override
	protected void onRevealDisplay() {
		// React on place request e.g use the dispatcher to load the data from the server
	}
}
In the gwt-presenter class hierarchy there was no possibility to define the model class the presenter will be responsible for. For that reason we introduced a PresentDTO<T> and PresentDTOs<T> interfaces to ensure the existence of T getDTO() etc. methods. The view classes are quite straightforward, the only difference is that back in 2009 ui:binder was not really there, therefore the gwt-presenter had no direct support for it. But switching to the declarative layout definition was indeed very easy - each view defines its own *.ui.xml file and the asWidget() method just returns the result of the uiBinder.createAndBindUi() call. As you can see in the code below we introduced also a WidgetsManager class which is a convinient way to managed all the widgets the view is defining (offering a general setEditable() method and taking care of the validation visualization).
View:
public class HistoryView implements Display {
	interface HistoryViewUiBinder extends UiBinder<LayoutPanel, HistoryView> {}
	private static HistoryViewUiBinder uiBinder = GWT.create(HistoryViewUiBinder.class);

	@UiField
	LabeledSuggestBox renalDisease;
	@UiField
	DateBox renalDiseaseStart;
	@UiField
	TextArea renalDiseaseText;
	@UiField
	ValueListBox hypertension;

	private final WidgetsManager widgetsManager;
	private final LayoutPanel content;

	@Inject
	public HistoryView(WidgetsManager widgetsManager, final RegisterConstants c) {
		this.widgetsManager = widgetsManager;
		content = uiBinder.createAndBindUi(this);
		content.setTitle(c.historyTab());
		//Registering the widgets within the widget mgr.
		widgetsManager.registerWidgets(
				new String[] {"primaryDiseaseGroup",
						"primaryDiseaseDiagnosis", "primaryDiseaseStart"},
				new Widget[] {
						renalDisease,
						renalDiseaseText,
						renalDiseaseStart});
		widgetsManager.configureValidation(HistoryDTO.class);
	}

	@Override
	public Widget asWidget() {
		return content;
	}

	@Override
	public HasText getPrimaryDiagnosis() {
		return renalDiseaseText;
	}

	@Override
	public HasText getPrimaryDisease() {
		return renalDisease;
	}

	@Override
	public HasValue<Date> getPrimaryDiseaseStart() {
		return renalDiseaseStart;
	}
}
To ensure a loosely coupled client we try to communicate between the presenters only via the EventBus or PlaceRequests, so if a new part of the UI should be rendered, a new place event needs to be fired.
2. Client - server communication
The client - server communication is based fully on the GWT-RPC mechanism. As mentioned above we are using the gwt-dispatch library meaning that for every request, we have a command object, result object and a server side handler. It is a bit verbose, but in the end it is also a very simple pattern and every new dev introduced to our team grasps it very quickly. The implementation of the client-side caching is easily done, as you just need to compare the command object which should be executed and if one of them has been already seen, then you can serve the already received result saving you one round-trip.
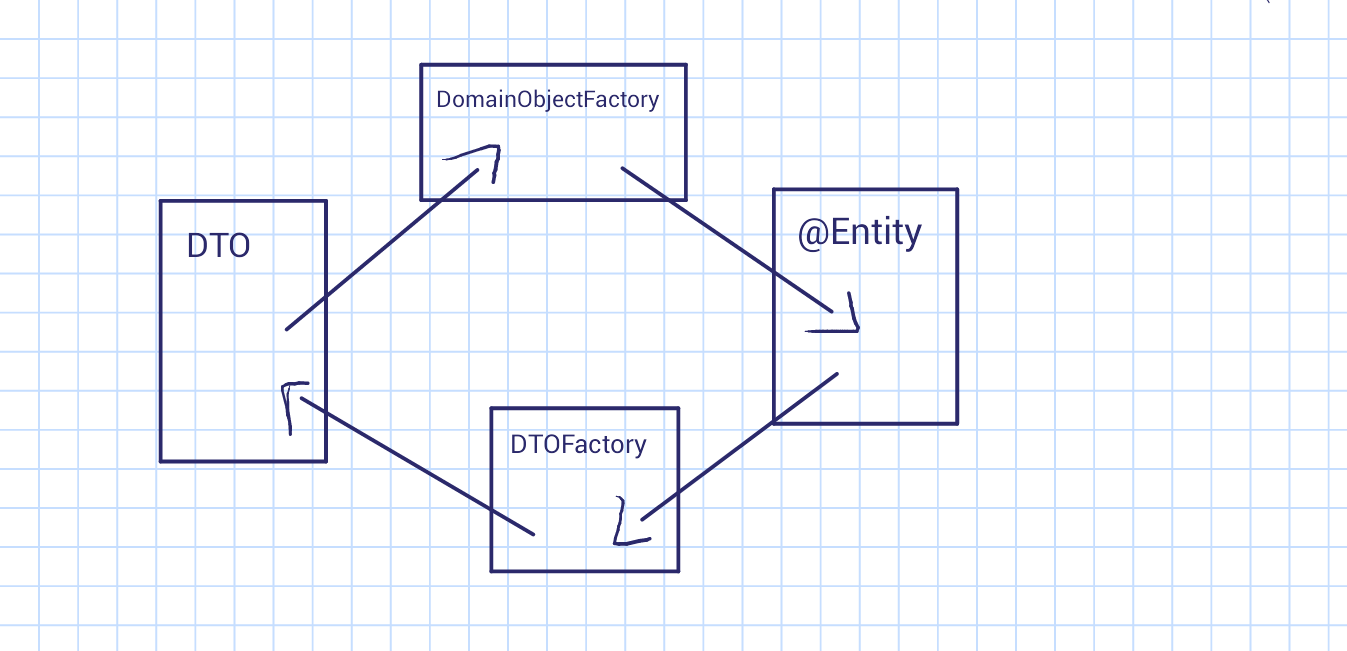
To execute a command a corresponding object just needs to be passed to the dispatcher which is a singleton on the client and gets injected to every presenter that should be able to trigger the communication. In most of the cases the result of a command (or to use gwt-dispatch terminology: an action) contains a DTO object which is then shown by the presenter. On the server side we are using JPA & Hibernate so obviously we need to take care of the server entity to DTO conversion. Although some libraries exists for this purpose (e.g gilead), in our specific setting we decided to implement it ourself which was actually a straightforward task when using the reflection API and sticking to a well defined class hierarchy of our own.

3. Testing the client
One of the main advantages of doing MVP is the separation of the business logic (sitting in the presenter) from the actual UI components (being a part of the view) resulting in the ability of writing normal, fast unit test (normal, meaning not using the GWTTestCase) and mocking the views. Nevertheless in our project we use selenium as the main way to assure the correct functionality of our client. As using the normal selenium recorder is not an option with GWT due to the element ids changing during each compile process, we tried to get our selenium tests (written in java as normal unit tests) as independent as it only can be from the layout definition itself (trying not to use exact XPath etc.). Our client is very data input heavy, so we have a lot of input components to test. When we test if the entities get created in a correct way, we just access all visible input components of a certain type, populate them with a random content (which we then store for later comparison), trigger the save action and reload the UI to verify if the same components holds still the same data. Thus, we don’t have to update the tests if our data definition changes and we have introduced some new input components. The test will also work if the layout of the UI changes either on purpose, because we rearranged it, or when a new GWT version switch to a different HTML representation for some standard widgets.
Getting certain elements from selenium driver:
protected static ArrayList<WebElement> getVisibleElements(String tagName,
			final String classString) {
		List<WebElement> elements = driver.findElements(By.tagName(tagName));
		return Lists.newArrayList(Collections2.filter(elements,
				new Predicate<WebElement>() {
					@Override
					public boolean apply(@Nullable WebElement input) {
						boolean b = false;
						try {
							String classAttribute = input.getAttribute("class");
							b = input.isDisplayed() && classAttribute != null
									&& classAttribute.contains(classString);
						} catch (StaleElementReferenceException e) {
							// Ignoring stale element
						}
						return b;
					}
				}));
	}
4. Issues
We are quite happy how things are working now, but there is room for improvement:
- The compile time during development: trying to change something in the client code in a iterative manner using the standard DevMode is very frustrating as it takes just too much time. SuperDevMode improved a lot our situation but we still have the problem of having the server and client side in one maven project - changing the server-side code means a mvn clean -DskipTests tomcat7:run-war and this means basically an “espresso” break.
- The size of the client: our *.cache.js file is currently 6.1MB (we use the gwtquery and gwt-chosen libs which are quite large) We will definitely try to introduce some code splitting in the future release, to load only as much as we need and not everything from the beginning.
- Execution time of the selenium tests: our current selenium suite takes a bit over 3 hours to run on our CI server. And although we could, we don’t have enough of the presenter unit tests to have a sufficient coverage letting us sleep well at night. Here probably a wrong choice have been made: concentrating to much on the selenium tests and trying to go for a very exhaustive test suite, instead of implementing a good amount of unit tests for the presenters and a simpler selenium suite for the main work flows in the application.